How to Replace a Leather Watch Strap
A timepiece band is not just a functional part of the watch; it’s an identity-establishing factor bringing style and uniqueness. For people who value fashion, the above statement is true. Knowing this importance goes beyond its practicality because one can use it to express themselves or even match it with other accessories such as clothes. If you are wondering how to replace your leather watch strap, this guide is for you.
We will take you through step by step on what needs to be done from choosing the best strap for your watch up to installing it correctly so that both form and function are achieved seamlessly.
Preparations
Firstly before we start changing our leather watch straps there are some things which need to be prepared beforehand like tools required and setting up a clean working area where no parts could get lost easily while working on them etcetera… Also having appropriate tools would make the whole process much easier thus saving time too. Some of these tools include spring bar tools and, pin pushers among others which might come in handy when dealing with small delicate parts hence tweezers may also be required sometimes depending on the situation at hand
Choosing the Right Replacement Strap:
-
Material Considerations: Leather Types and Qualities:
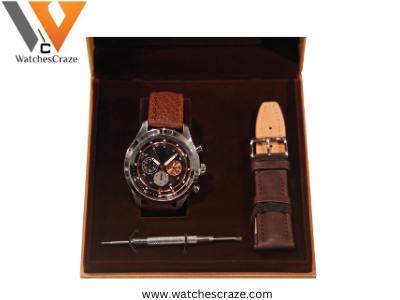
When you’re on the hunt for a new leather watch strap, it’s like exploring a whole world of textures and stories. Think of leather as characters in a book—each type has its tale to tell. You’ve got genuine leather, the reliable friend that’s been around for ages, offering decent quality at an affordable price. Then there’s full-grain leather, the rugged adventurer with natural markings and durability that can withstand anything life throws its way. And let’s not forget top-grain leather, the smooth talker with a polished appearance perfect for any occasion. Take your time to decide which character suits your style and budget best.
-
Matching the Strap to Your Watch: Size and Style:
Picture your watch as the leading actor on a stage, and the strap as its trusty sidekick, enhancing its performance. But just like casting for a role, you need to ensure they match perfectly. Start by measuring the width of the lugs on your watch—the stage where the strap takes center stage. This ensures a snug fit and prevents any wardrobe malfunctions. Then, dive into the world of style. Is your watch a classic gentleman, a sporty adventurer, or a trendy trendsetter? Choose a strap that complements its personality and brings out its best features. After all, a well-matched duo steals the show every time.
Removing the Old Strap
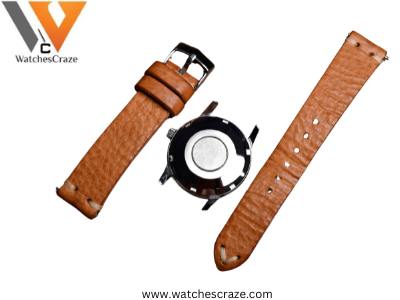
Before knowing how to replace a leather watch strap let’s learn about how to remove the old strap.
-
Identifying attachment points
Imagine your watch strap as a treasure map, and the attachment points are like hidden gems waiting to be discovered. Take a close look at the back of your watch where the strap connects to the case. Look for little metal bars, often called spring bars, holding the strap in place. These are your key clues. Sometimes they’re easy to spot, like finding a penny on the sidewalk. Other times, you might need to play detective with a magnifying glass or a flashlight to uncover them. Once you’ve found these attachment points, you’re one step closer to unlocking your watch’s new look.
-
Safely detaching the old strap without damaging the watch
Removing the old strap is like saying goodbye to an old friend—it requires care and attention to avoid any hurt feelings (or in this case, damage to your watch). Grab your trusty spring bar tool—it’s like the Swiss Army knife of watch repairs. Taking off the old strap is similar to saying bye to a good friend — you have to be careful not to hurt them (or your watch).
Use a spring bar tool, which acts as a watch repair Swiss Army knife. Insert one end of the tool gently between the lug and strap, and then push down on it delicately to compress the spring bar. This will cause the spring bar to withdraw itself back into place, releasing its hold on the band. Do this same step for another attaching point.
Your old strap is free. Be sure to store it in a safe place for nostalgic reasons or future use. With the old strap removed, your watch is now ready for its fresh new look.
Installing the New Strap
-
Aligning the new strap correctly
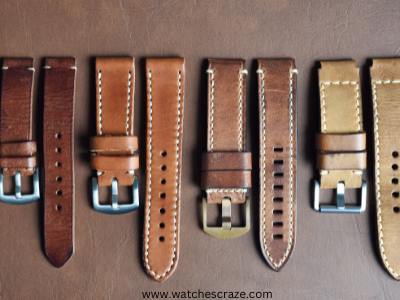
Putting on your new watch strap is like threading a needle — it’s all about accuracy and getting that perfect fit. Ensure that when worn, the buckle or clasp is positioned at the bottom side of your wrist; therefore make sure that the new strap faces in this direction. Then align strap ends with attachment points on the watch case where they belong according to size. Take your time to ensure the strap is centered and sits flush against the case, just like sliding into a perfectly fitted glove. Once everything looks aligned and in place, you’re ready for the next step.
-
Attach the new strap securely
Now it’s time to secure your new strap in place, like fastening the last button on your favorite shirt. Grab your spring bar tool once again—it’s your trusty sidekick for this task. Position one end of the tool between the lug and the strap, then gently press to compress the spring bar. Moving the strap’s end onto the lug until a click is heard or felt means that it has locked successfully. Do this also for the other end of the strap so that both sides are fixed tightly. Pull gently to confirm there are no loose ends and voila! Your new band is secured in place ready for any kind of adventure.
Adjusting the Fit:
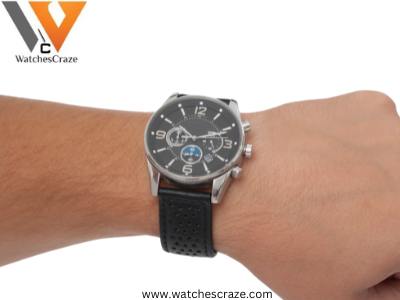
Attaining the correct size of your new watch band is similar to adjusting a suit; this involves comfort as well as fashion. Reflect on how tight or loose you would like your wristwatch to be worn while considering its functionality against aesthetics. After finding out what fits best, modify accordingly;
If there are buckle holes in your strap just select one that feels most comfortable then fasten securely using either buckle or clasp. However, if resizing becomes necessary reach for resizing tools such as taking off extra links or punching more holes depending on what will work out best for you. Remember we want it snug not too tight nor too loose but fitting well all around so that it does not only rest easy upon our hands but also appears good unto them too!

